
Japanese rice balls are one of those foods that look simple, then you try making them and end up with rice stuck to your hands, triangles that crack, and fillings that leak out. The good news is it’s not you, it’s usually rice choice, seasoning, and shaping technique.
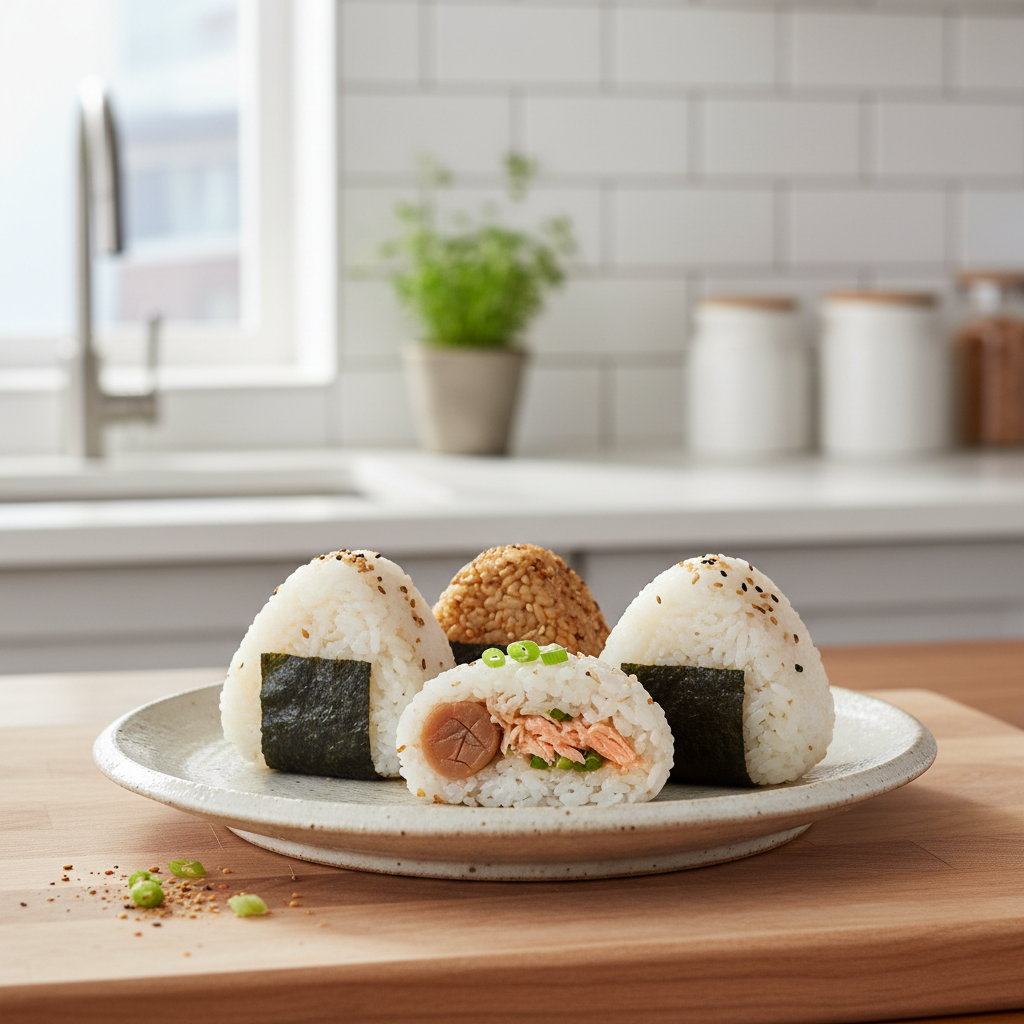
If you want a reliable weeknight lunch option, a kid-friendly snack, or a portable side for soup and salad, onigiri checks all the boxes. You can keep it basic with salted rice, or treat it like a “rice sandwich” with bold fillings.
This guide keeps it practical, what rice actually works in the U.S., how to season without making it mushy, and how to wrap nori so it stays crisp as long as possible. You’ll also get a quick troubleshooting checklist, plus a small filling table to help you mix and match.
What makes great onigiri (and why most first attempts fail)
The best onigiri tastes clean and lightly seasoned, holds its shape, and has a clear contrast between soft rice and flavorful filling. Most problems come from a few predictable spots.
- Wrong rice type: long-grain varieties tend to separate, short-grain “sushi rice” clings better.
- Rice too dry or too wet: undercooked rice crumbles, overwatered rice turns gummy.
- Overmixing seasoning: stirring aggressively breaks grains and makes the texture pasty.
- Not enough pressure, or too much: too loose falls apart, too tight becomes dense and tough.
According to the USDA Food Safety and Inspection Service (USDA FSIS), cooked rice should not sit at room temperature for extended periods because bacteria can grow; that’s why onigiri is often made, cooled briefly, then packed and kept cool if it won’t be eaten soon.
Ingredients and tools you actually need
You can make Japanese rice balls with very little equipment. An onigiri mold helps, but it’s not required.
Core ingredients
- Japanese short-grain rice (often labeled sushi rice in U.S. stores)
- Kosher salt or fine sea salt
- Nori sheets (optional but classic)
- Filling of choice (see ideas below)
Helpful tools
- Rice cooker or medium pot with tight lid
- Small bowl of water for your hands
- Plastic wrap (surprisingly useful for clean shaping)
- Kitchen towel or paper towel for wiping hands
Key point: if your rice tastes good on its own, your onigiri will taste good. This isn’t a dish where the filling should “fix” bland rice.
Easy Japanese rice balls recipe (classic salted onigiri)
This method is designed for consistency, especially if you’re new to shaping. It makes about 6 medium onigiri, depending on how big you like them.
1) Cook the rice for stickiness, not fluff
Rinse short-grain rice until the water runs mostly clear, then cook it using your rice cooker’s standard setting. If cooking on the stovetop, keep the lid on and avoid stirring, you want intact grains that cling together.
- Let the rice rest 10 minutes after cooking, still covered.
- Fluff gently with a rice paddle, don’t mash.
2) Prep fillings before your hands touch rice
Get fillings ready in small portions. Big chunks cause cracks and leaks, especially in softer fillings like tuna mayo.
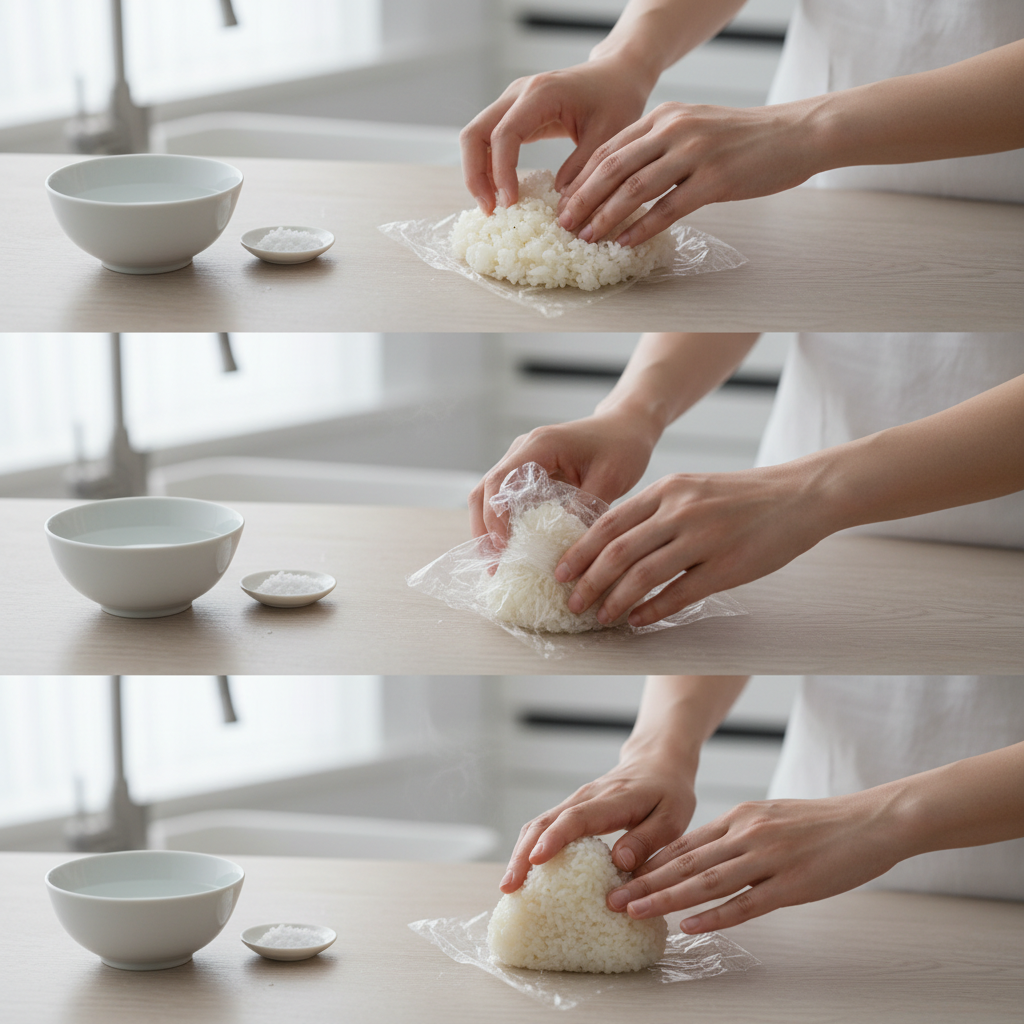
3) Season your hands and shape
Lightly wet your hands, then rub a pinch of salt across your palms. Take about 1/2 cup warm rice, make a shallow dent, add 1 to 2 teaspoons filling, cover with a bit more rice.
- Shape into a triangle or round, pressing firmly enough to hold, but not crushing.
- If you keep tearing the surface, switch to plastic wrap shaping: rice in wrap, add filling, wrap tight, then form the shape through the plastic.
4) Add nori the smart way
If eating right away, wrap a strip of nori around the middle for grip. If packing for later, keep nori separate and add just before eating, it helps avoid chewiness.
Filling ideas (with a quick compatibility table)
Onigiri fillings work best when they’re flavorful and not too wet. If a filling is saucy, make the portion smaller and seal it well.
| Filling | Flavor | Moisture level | Good for meal prep? |
|---|---|---|---|
| Salmon (flaked, lightly salted) | Savory, rich | Medium | Yes, usually |
| Tuna mayo | Creamy, salty | High | Sometimes, keep cold |
| Umeboshi (pickled plum) | Tart, salty | Low | Yes |
| Kombu simmered in soy (shio kombu also works) | Umami | Low | Yes |
| Chicken teriyaki (chopped small) | Sweet-savory | Medium | Yes, if cooled quickly |
Tip: For American pantries, canned salmon, rotisserie chicken, or even leftover grilled steak can work, just chop fine and avoid excess sauce.
Quick self-check: why your rice balls fall apart
If your Japanese rice balls keep cracking or collapsing, this checklist usually points to the fix within a minute.
- Rice looks dry and separated: likely undercooked or too little water, try a touch more water next batch and longer rest.
- Rice feels gummy and smears: too much water or over-stirring, rinse well and fluff gently.
- Triangle won’t hold: not enough compression, press with steady pressure on three sides.
- Filling leaks: portion too big or too wet, use less and fully cover with rice before shaping.
- Hands are a mess: keep a water bowl nearby, re-wet lightly, or use plastic wrap.
Also, don’t wait until the rice turns cold and stiff, warm rice shapes better. Hot rice can burn, so give it a few minutes until it’s comfortable to handle.
Storage, food safety, and packing for lunch
Onigiri can be great for packed lunches, but treat it like any cooked rice dish. According to the U.S. Food & Drug Administration (FDA), perishable foods should not be left at room temperature for more than 2 hours, and in hotter conditions that window can be shorter.
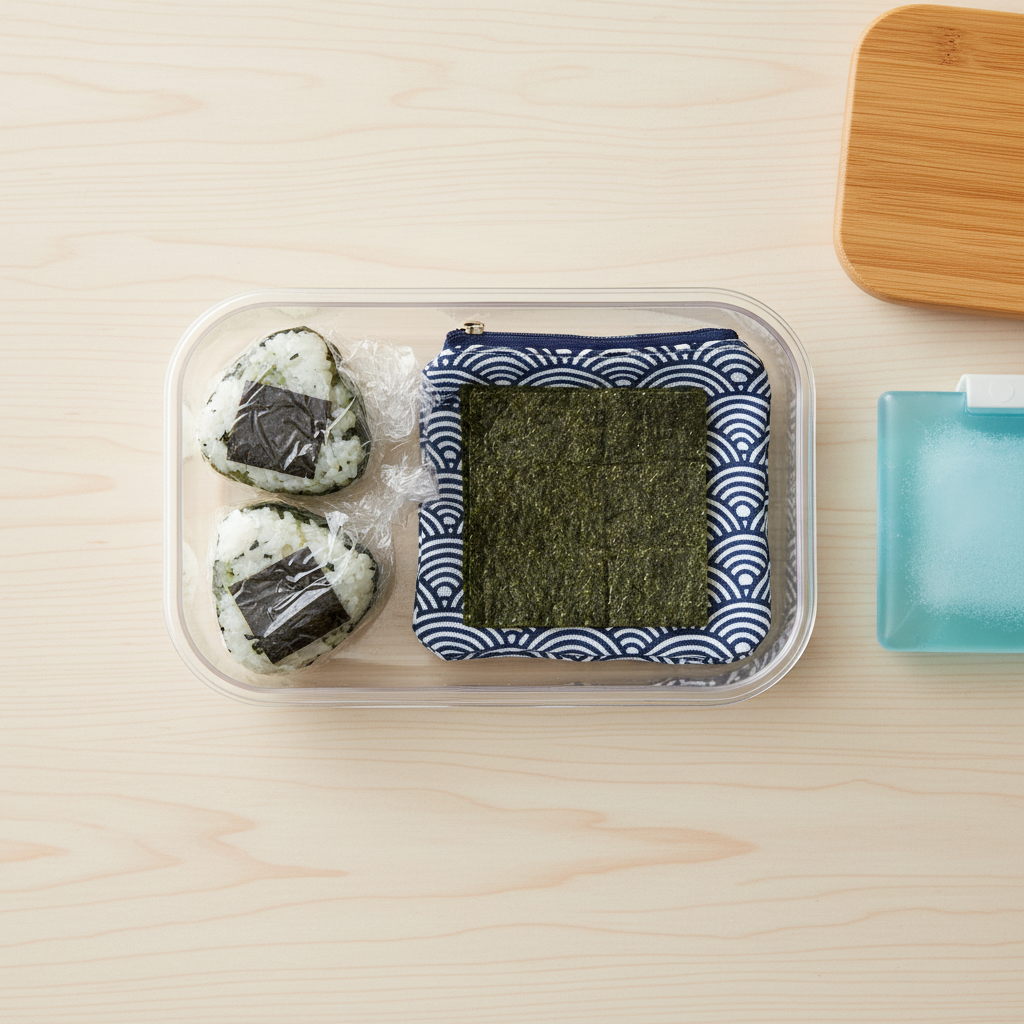
Practical storage habits that tend to work well:
- For same-day eating: cool briefly, wrap individually, refrigerate, then bring with an ice pack.
- Keep nori dry: pack it separately if you care about crunch.
- Reheating: microwave briefly to take the chill off, then add nori after.
- Freezing: many fillings freeze fine, but watery mayo-based fillings can get weird, freeze plain or with low-moisture fillings.
If you have health conditions, are preparing food for young kids, or you’re unsure about safe holding times, it’s reasonable to be conservative and consult a qualified professional.
Common mistakes that waste time (and how to avoid them)
A few “popular” ideas look nice online but can make results worse in a normal home kitchen.
- Using jasmine or basmati: tasty rice, wrong structure for classic onigiri. If you must, expect a looser shape.
- Mixing lots of sauce into rice: it weakens the grain structure and turns the center mushy.
- Making jumbo rice balls: big onigiri is harder to seal, start smaller until your hands learn the pressure.
- Wrapping nori too early: it turns leathery, unless you eat immediately.
Quick win: the plastic wrap trick solves more frustration than any fancy tool, especially if you’re making a batch.
Conclusion: a simple routine that makes onigiri feel easy
Once you nail rice texture and gentle-but-firm shaping, Japanese rice balls stop being fussy and start being a dependable staple. Cook short-grain rice, keep fillings small and not too wet, salt your hands, press just enough to hold.
If you want an easy next step, pick one filling for the week and make a small batch, your second try usually feels dramatically smoother than the first.
FAQ
What rice should I buy in the U.S. for japanese rice balls?
Look for Japanese short-grain rice or anything labeled sushi rice. Medium-grain can work in a pinch, but long-grain varieties usually won’t hold a classic shape as well.
Do I need sushi vinegar for onigiri?
No. Onigiri is typically seasoned with salt rather than vinegar. If you add vinegar, the flavor shifts closer to sushi rice, which some people like, but it’s not required.
Why are my onigiri triangles cracking on the edges?
Cracking often means the outside rice layer is too thin over the filling, or the rice is a bit dry. Use a smaller filling portion and cover it fully before pressing the sides.
Is it okay to make onigiri the night before?
Many people do, but texture and food safety depend on storage. Wrap each piece, refrigerate promptly, and keep it cold for transport. For best texture, add nori right before eating.
Can I use an onigiri mold instead of shaping by hand?
Yes, molds are convenient and consistent. You’ll still get better results if the rice texture is right and the filling portion stays modest, a mold can’t fix overly wet rice.
How do I keep nori crispy on packed lunches?
Pack nori separately and wrap it right before eating. If you want it even easier, use a strip of nori stored in a small baggie, then “belt” it around the rice ball at lunch.
What are easy beginner fillings that don’t leak?
Umeboshi, flaked salted salmon, and kombu tend to behave well because they’re flavorful with lower moisture. Tuna mayo tastes great, but it’s more likely to seep unless you use a small amount.
If you’re making japanese rice balls for busy mornings and want a more streamlined routine, it can help to plan two low-moisture fillings, portion them once, and keep nori separate so packing stays fast without sacrificing texture.